This resource is intended to help you get started with Google Analytics 4, Google Tag Manager, and the Yoast SEO plugin. All of these get added to your site and/or configured for you at launch.
There are professionals who make a living creating videos, articles, and even books on most of the topics covered here, so treat this guide as a starting point full of recommendations on where to look for deeper learning.
Section 1: Yoast SEO Plugin
The Yoast SEO plugin is a tool that can be used for on-page and technical SEO automation and overrides.
We (Forge and Smith) recommend using it more for the technical SEO side of website support, because some of its on-page recommendations are outdated. Here’s an overview of all of the key settings.
Technical SEO Settings
All of these can be found by navigating to Yoast SEO > Settings via the lefthand WordPress menu.
Site title and separator: Yoast automatically appends the site title to all pages and posts using a custom separator (such as “|” or “–”), unless specific Yoast page or post settings are configured to change or remove the site title. It pulls the site title as it’s set in WordPress under Settings > General. Learn more here.
XML sitemap: Yoast ensures that your XML sitemap is always up-to-date, adding and removing pages and posts in real time as you make edits in WordPress. This way, Google and other search engines are always using a completely accurate map of your site’s hierarchy and content.
You can toggle this feature on and off under Yoast’s Settings > Site Features, although we don’t recommend turning it off unless you have a backup plan for adding and maintaining your XML sitemap. Learn more about Yoast XML sitemaps here. See also: Why XML sitemaps matter in general.
Site image: This is where we (Forge and Smith) have set a custom “fallback” image, which is used in mobile search results and when pages or posts are shared on social media/direct messaging apps if no featured image was set on a page. This way, no matter what, all of your pages automatically have an attractive sharing image. Learn more in this resource.
If you don’t configure this and no featured image is set, Google and social platforms will choose the first photo on the page, which isn’t always formatted correctly or ideal to represent the content! Learn more here.
Content types: Here, you can control whether Google indexes certain content types that exist in WordPress by simply toggling on/off indexing. The reason to turn off a content type from indexing is if the public isn’t meant to see it. Usually this is because it’s something the public isn’t meant to see, or because it’s a taxonomy used for filtering which doesn’t have a custom design for its archive page. An example is the Refoundry Reusable Component Blocks, which are a content type but not meant to be seen by the public.
If you change the settings from launch configurations, it can take a few weeks to see changes in search results.
You can also customize the default SEO page title for all pages, posts, and other listed content types. This will be used for all pages and posts unless they are customized per-page (in each page’s Yoast SEO box). Yoast sets a default that’s common and good for SEO: the page/post title, a separator, and the site title. Learn more here.
Categories & tags: As with content types, here you can control whether Google indexes certain taxonomies’ archive pages that are used on your various post types. The reason to turn one off from indexing is the same: if there’s no custom design to show that archive, it probably wasn’t a critical page to the user experience, and it won’t look good if a person navigates to it from search because certain elements won’t be customized.
You can also customize the default SEO page title for all taxonomies. As above, this will be used for all terms within that taxonomy unless they are customized per-term. An example is “categories,” which is used for your posts. It’s set to be indexed by Google, which means every category you have configured will have an archive page that’s visible to Google. Learn more here.
On-Page SEO Settings
Each page and post has a Yoast SEO box in the editor. It usually sits at the bottom of the page, below the main content. You may have to toggle it open using the arrow:
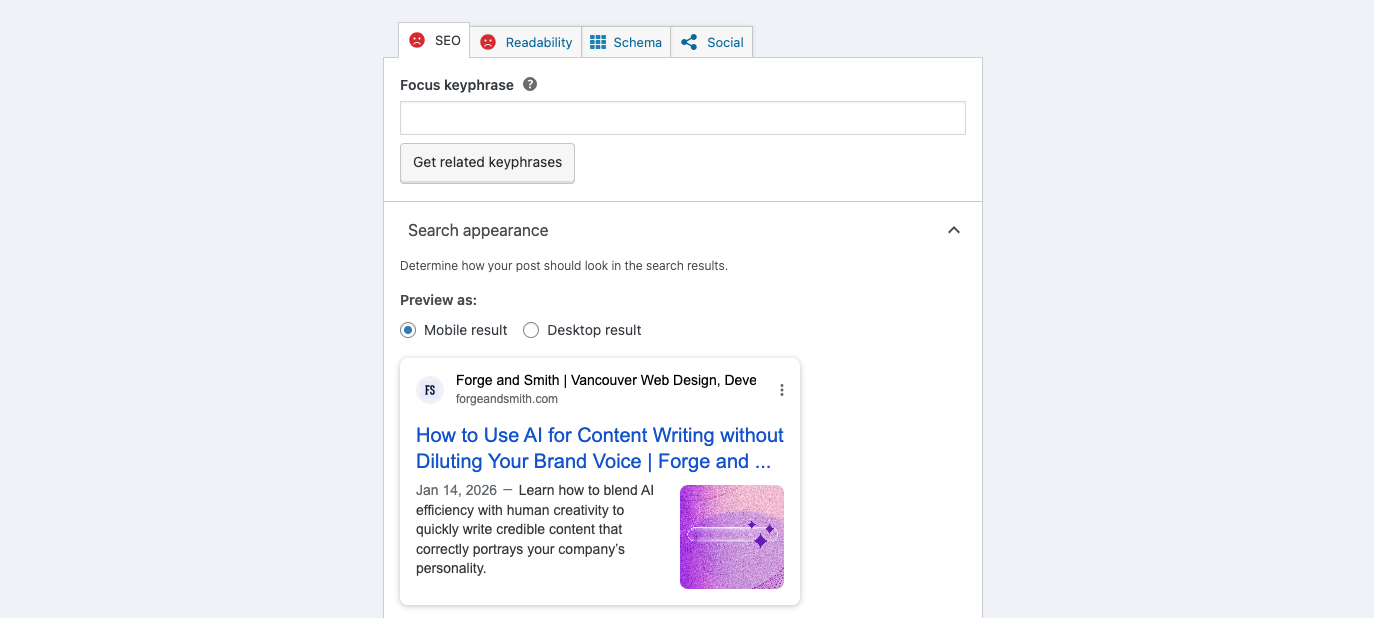
Here, you can customize the page title, meta description, slug, social sharing image, and schema markup. You can also use Yoast’s SEO insights, although as mentioned, these can be outdated and should be used only as suggestions, if used at all.
Focus keyphrase: This is where you can set a focus phrase for a page or post, ie. the keywords for which you want the page to rank. We (Forge and Smith) don’t configure these by default, because of how Yoast uses this to produce a set of (frequently outdated) suggestions. That’s why they are all red unhappy faces. In general, we recommend writing for humans first (not “for SEO”), and only adding keywords where they fit naturally.
However, you can absolutely configure focus phrases post-launch! You would add your phrase to the input field, then Yoast would generate a score sheet. We’ve written a whole blog post on which parts of the insights are valuable and which can be ignored. Learn more here.
SEO title: This is where you can configure how your post title looks in search results. This allows you to have a unique, SEO-friendly title for search, without altering the title as it appears on your website. It’s also handy for shortening long titles for search results, so they don’t get truncated (or so the important words are at the part before truncation).
Slug: This is where you can customize the slug or URL for your page or post. You can also do this in the WordPress settings in the upper righthand corner. You don’t have to customize slugs, but you can in order to add keywords, remove stop words (such as “a’ and “the”), or to shorten extremely long slugs.
Meta description: This is where you can write a custom excerpt that appears below the page title in search results. This short copy helps provide context, and make it extra-enticing to click. Keep in mind that Google frequently rewrites meta descriptions, even if you have a custom one in place.
We (Forge and Smith) have configured custom meta descriptions for your main pages, and Yoast will append an excerpt to all posts in the meta description field by default. You can edit this in the site-wide or per-post Yoast settings.
Readability: This tab provides insight on how readable your content is. It isn’t particularly helpful for websites written entirely by journalists or other professional writers, or those who have to use university-level or technical words on a regular basis. This is because it recommends writing at a sixth or seventh grade level. You can turn off this feature in Yoast’s general settings, if you never intend to use it. Learn more here.
Schema: Yoast automatically detects the type of page or post, and applies schema markup to enhance search results. If for any reason you want to change it, you can find it here. Keep in mind that sometimes Yoast’s schema settings can cause conflicts with other schema plugins. You can reach out to us if you need help. Learn more here.
Social: You can set a third custom title here, if you want your page or post to have a unique title when shared on social media. This is useful if you want it to be more like a CTA, or more concise and clever. This will override the actual page title for social media, but a custom SEO title would still be applied in search results.
You can also configure a custom image for social media. This is, again, useful if you want to add elements that make it more like a CTA (such as a design with a “button” to make people want to click/tap the link). If you set an image here, it will override the feature image for the page.
Section 2: Google Analytics and Google Tag Manager
We migrate Google’s tracking pixel from your old site to your new site at launch, so everything in Google Analytics 4 (GA4) works the same way it did before. Google Analytics and Google Tag Manager (GTM) are tools that can take months or even years to master, but we’ll provide an overview of key areas to quickly look for data, and links to learn more.
Here’s a useful GA4 getting started video for beginners. Google also offers a series of courses.
Here’s a Google Tag Manager getting started video for beginners, although GTM is quite a bit more technical to use. You can try their developer training videos.
Google Analytics Tips
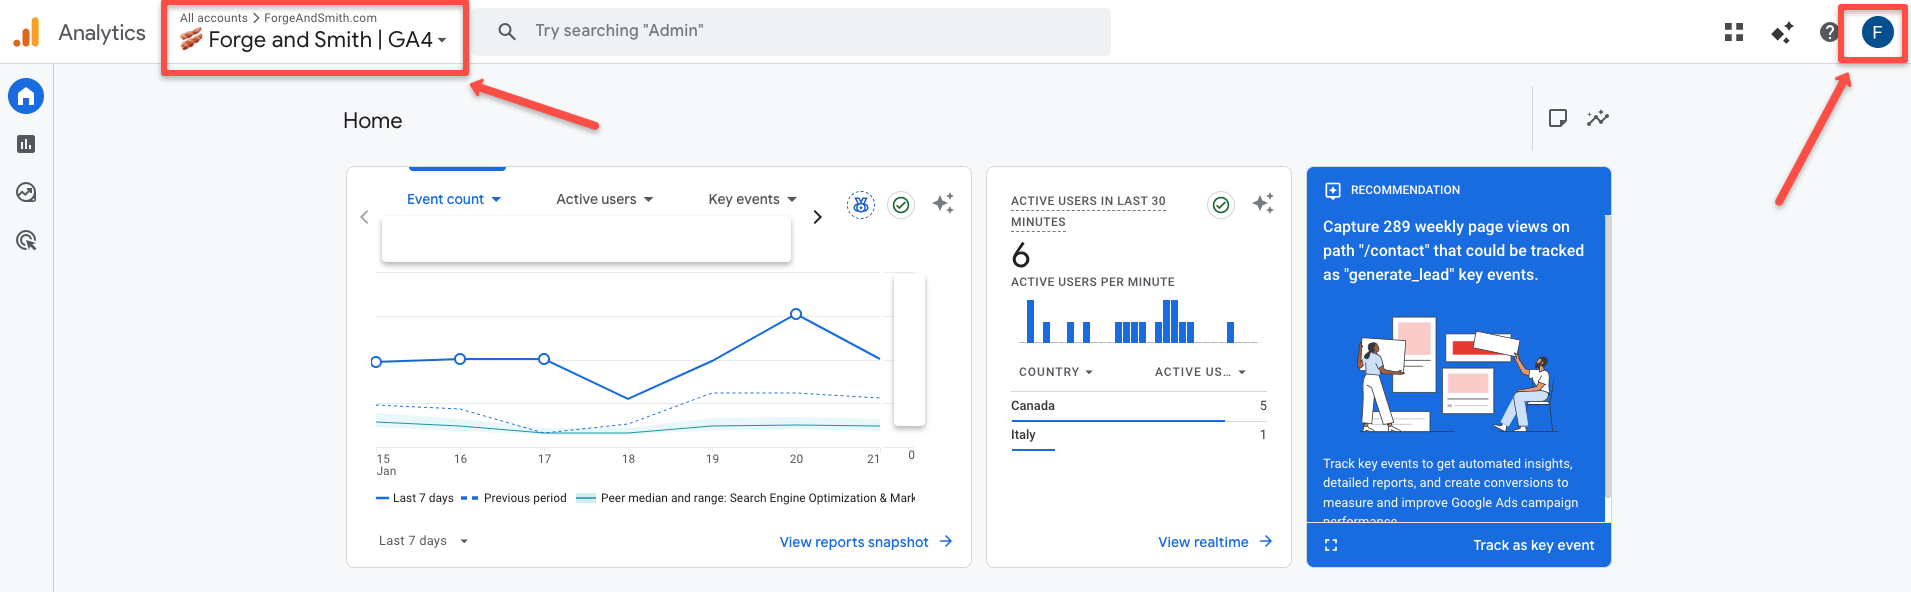
You can access Google Analytics by visiting https://analytics.google.com/ while logged into Chrome as an account with access. If your site’s dashboard doesn’t open right away or you can’t find your site in the menu, you may not have access and will need to ask someone on the team to grant you viewer or editor permissions.
To add a new user, someone with admin access can visit the admin settings panel in the bottom left corner of GA4, and then choose Account access management.
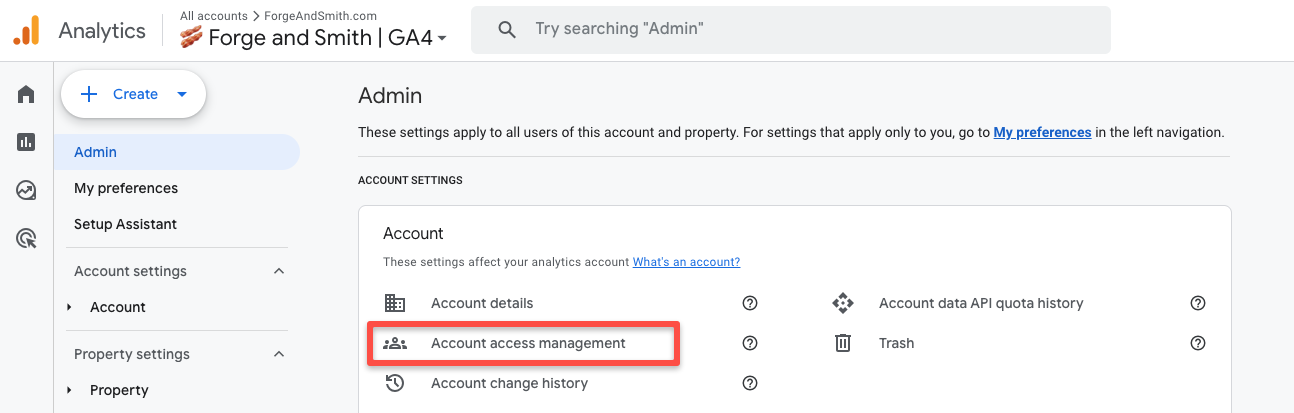
From there you’ll be able to easily add people by email. The email address must be Gmail-based.
Once you are logged in, by default you’ll be looking at the main dashboard. You’ll see a general overview of your site’s performance in the last seven days. You can click to open any of these reports for more detail.
But the easiest way to navigate to key website data is to click the Reports menu item on the left pane, below the Home menu item.
The reports that usually provide the most insight are found under Reports > Life Cycle.
Acquisition: This is where you can find details about your traffic sources and users. The Traffic Acquisition report will show you data on the top traffic sources. You can adjust the date range in the upper right corner (it defaults to the last 28 days), compare date ranges, and add a secondary dimension (such as city) to see more granular data about users coming from each traffic source. Learn more here (video) and here (article).
Engagement This is another popular dashboard, because it shows you data on your events, pages and screens (by pageviews), and landing pages (by entrances).
Events are actions that show engagement or intent to convert, like PDF downloads or form submissions. They have to be configured in GTM to appear in GA4. Here’s a beginner’s video guide to events.
The dashboards for pages and screens and for landing pages show you the total number of people looking at your pages. You can easily see the most popular content, see how new content is performing, and add a secondary dimension of city or traffic source to see where your content’s visitors come from. Here’s a beginner’s video guide to pages and screens, and a beginner’s video guide to landing pages.
Here’s a general video guide to engagement metrics in GA4.
And lastly, here’s a video guide to creating custom reports in GA4.
Google Tag Manager Tips
GTM is where you can configure tags that add more custom data points to track in GA4, beyond the default events and the events that we (Forge and Smith) configured at launch.
Tags feed into events within the GA4 dashboards. Events can further be turned into key events (which used to be called goals in Universal Analytics), or they can remain as regular events. The reason to turn an event into a key event would be if it’s an ultimate site goal, ie. a conversion point.
You can access Google Tag Manager by visiting https://tagmanager.google.com/ while logged into Chrome as an account with access. If you can’t find your site in the menu, you may not have access and will need to ask someone to grant you viewer or editor permissions.
You can also access it by toggling to the other icon found within the upper GA4 menu, which switches between GA4 (orange) and GTM (blue):
There are three popular options in the lefthand menu that you might want to use or look at.
Variables are needed for certain tags and triggers. They are placeholders for data that will be filled in based on the user’s action. An example is a PDF filename, or a page URL. The variable is added into the GA4 data once the action is taken.
Tags is where you can find and manage the tags currently configured for your site.
Triggers is where you can find and manage triggers, which are the reasons a tag should fire (ie. be logged in GA4). Examples for common triggers are views, clicks, scrolling, video plays, video stops, etc. Here’s an introductory video to GTM, which includes both tags and triggers.