This resource is intended to help you get started and to get the most out of WordPress and Refoundry (a plugin that expands WordPress, engineered by Forge and Smith).
There are professionals who make a living creating videos, articles, and even books on most of the topics covered here, so treat this guide as a starting point full of recommendations on where to look for deeper learning.
Section 1: Quick Links
These are important links that you’ll want to keep handy any time you’re working on the website.
- Forge and Smith resources – A library of short articles that cover the most common questions we get from clients about WordPress, SEO, and other topics.
- Refoundry training videos – A library of how-to videos for getting started in the visual editor, using the blocks, laying out pages, changing styles, and more. This will continue to be updated!
- Refoundry blocks – Complete documentation for every single block, including all settings.
- Refoundry settings & features – Complete documentation for all settings and features (for blocks and for the site in general).
Section 2: Quick Intro to WordPress
Your new website is built on WordPress, and uses the Gutenberg editor.
WordPress is a content management system (CMS), and is the most popular one in the world. That’s because of its inherent benefits for SEO and accessibility, and its open source code that makes it easy to customize—and to find a developer who can jump in and support it.
Gutenberg is a visual, block-based editor that became the default WordPress editor in 2018, when it replaced the classic editor. Created back in 2004, the classic editor was like a Word Doc. It simply coded any text and images added into the editor box. Everything outside that text box was either controlled by a theme (made up of code), or custom-coded by a developer. This meant that non-developers couldn’t really do anything else with their sites except add pages using theme templates, and add text and images within that box.
The Gutenberg editor breaks the page down into blocks, which have their own settings (and may contain other blocks with their own settings). It allows more flexibility in layouts. You can also more easily see how the content will look when published, compared to the classic editor.
Here’s a video introduction to the Gutenberg editor, and an introductory article. Just keep in mind that these tutorials are using default WordPress blocks, whereas you’ll be using Refoundry blocks. Once you’re comfortable with the visual editor, or if you’ve already used it before, we recommend switching to our own video tutorials on getting started with Refoundry.
Searching, adding, and removing blocks works the same way, but there are significantly more settings when you use Refoundry blocks! Default WordPress blocks can work with your site, but might not look and function the way you expect, compared to the equivalent Refoundry block that we (Forge and Smith) have customized.
Section 3: Quick Intro to Refoundry
Refoundry is a plugin that was engineered by Forge and Smith in 2022, to enhance the Gutenberg editor. Anything WordPress can do on its own, Refoundry can do. Read the complete introduction to Refoundry’s purpose and benefits here.
The key differences between a regular WordPress site using Gutenberg and a Refoundry site are:
- No theme. No styles, layouts, or settings are locked up in the code. Anyone on your team can create layouts, save templates, rearrange blocks, and edit all content and styling. (You can also control who can do this through authoring controls, and lock certain blocks to avoid accidents.)
- Granular control. Every Refoundry block has a group of settings you can control from within the editor, without needing a developer. Refoundry edits the code for you. The settings may include style, layout, and advanced options.
- Reusable Component Blocks (RCBs). A RCB is a group of blocks with a unique layout and style settings, all saved as one unit for quickly being used again. You have access to a collection of these custom blocks that were designed for, and built into, your site, and can be quickly added to new pages. RCBs can be edited on the main block (to edit every single instance of the block across the site) or on the page (to edit just the local instance). You can continue to create more RCBs, too.
Every single regular Refoundry block has complete support documentation including screenshots and descriptions of how all settings work. Find Refoundry Blocks documentation here.
Every single Refoundry setting and feature also has complete support documentation including screenshots and descriptions. Find Refoundry Settings & Features documentation here.
RCBs are made up of regular blocks, so they don’t have settings and features – each block within them has its own, which are configured on the main instance unless edited locally. You can see all of your site’s RCBs here:
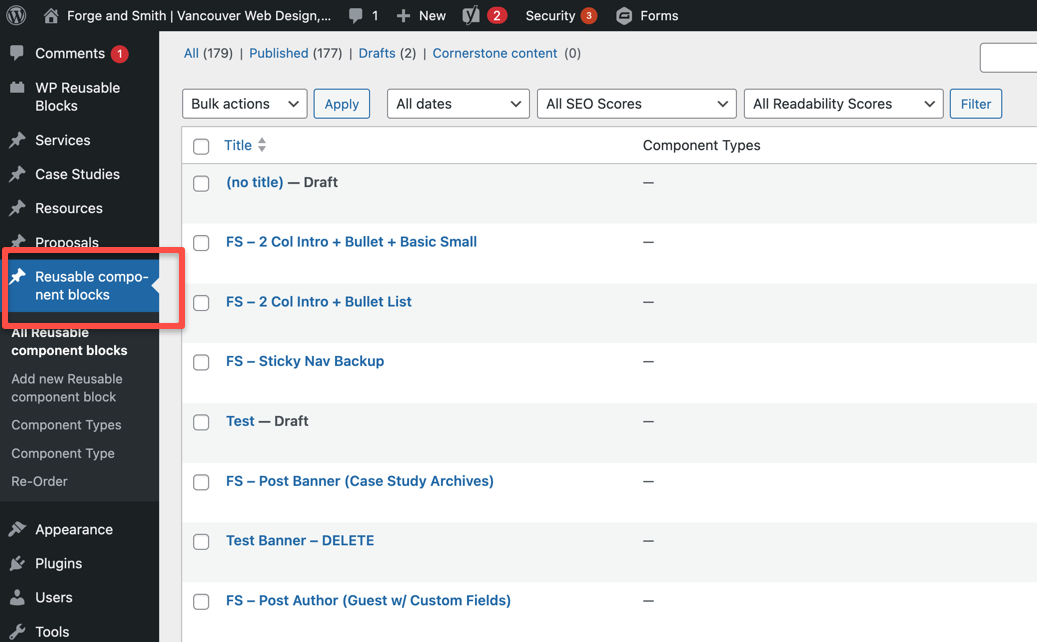
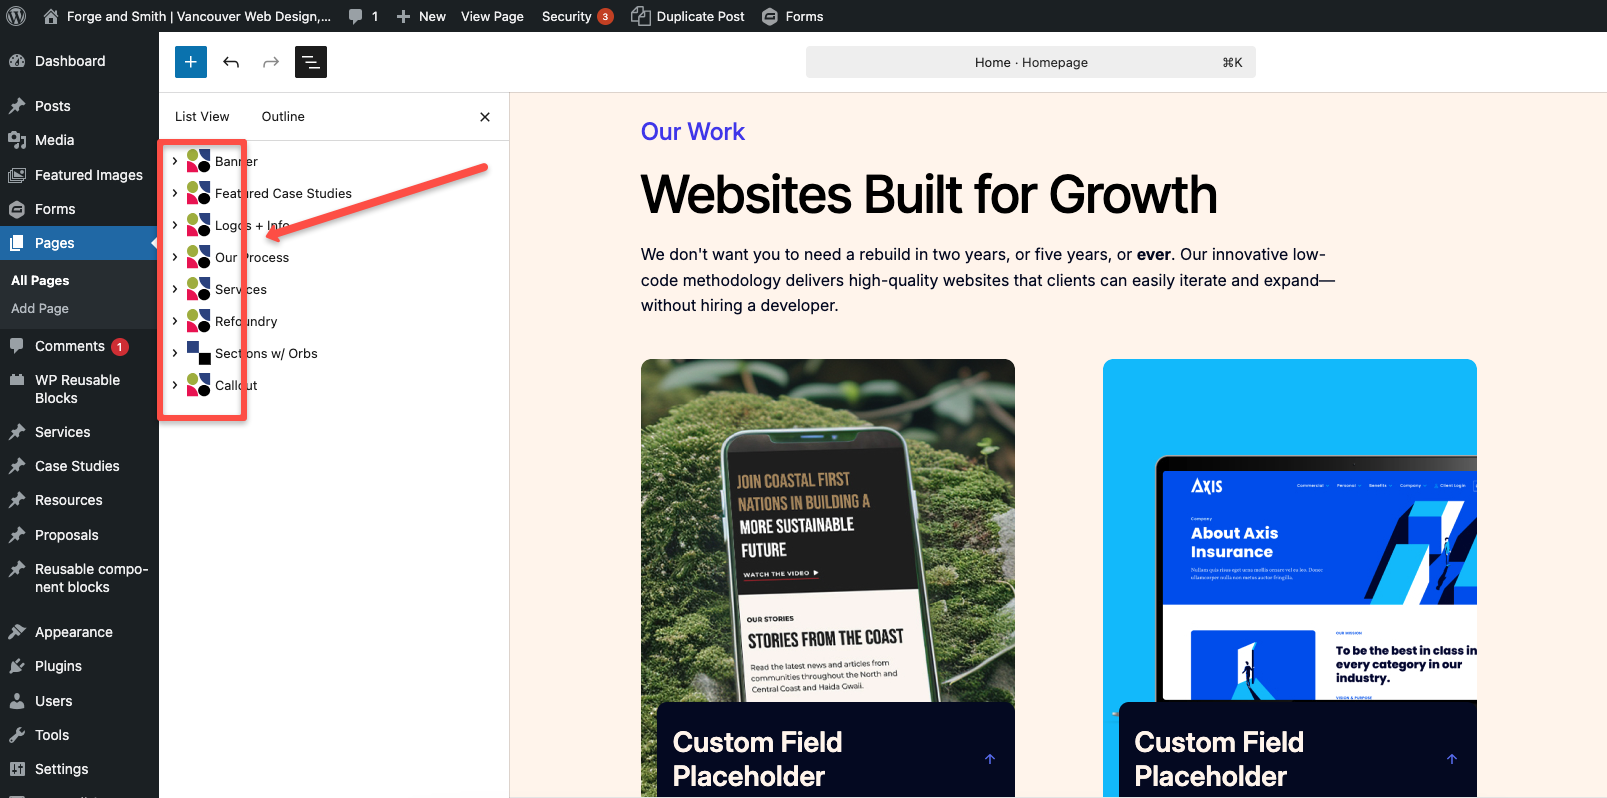
You can spot a RCB in the lefthand menu by its colourful icons (see below). Clicking it will highlight the block in the main editor. You can make local edits to change the text, image, and style settings. From the lefthand menu, you can also click to edit the global component of the RCB.
Section 4: Adding and Editing Content
Logging In
To start using your site, you need to log in. Visit the URL (usually your website name with /wp-admin/ on the end) and enter your username or email address and password. The login screen usually looks like this:
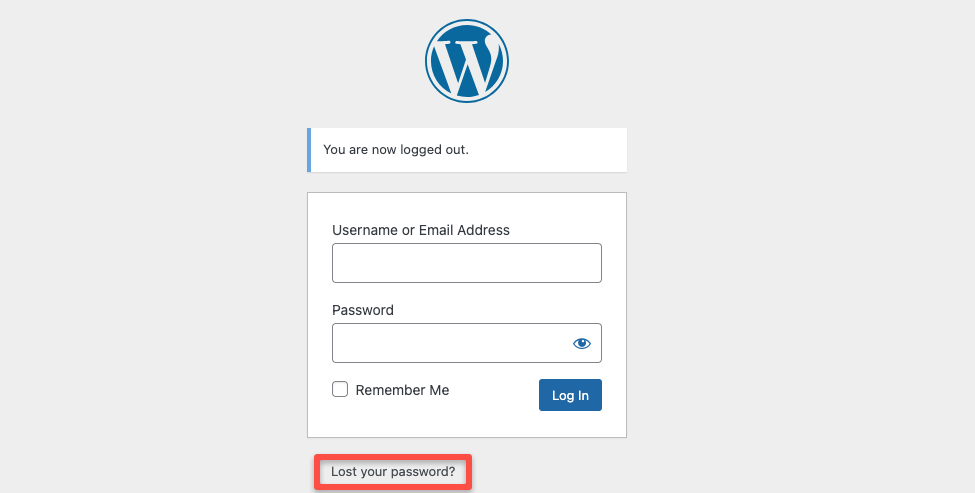
If you can’t remember your password, you can click “Lost your password?” to trigger an email with a reset link. If you don’t receive it or still can’t log in, you need to contact someone on your team with administrator permissions.
Once logged in, the first thing you’ll see is the main WordPress dashboard screen:
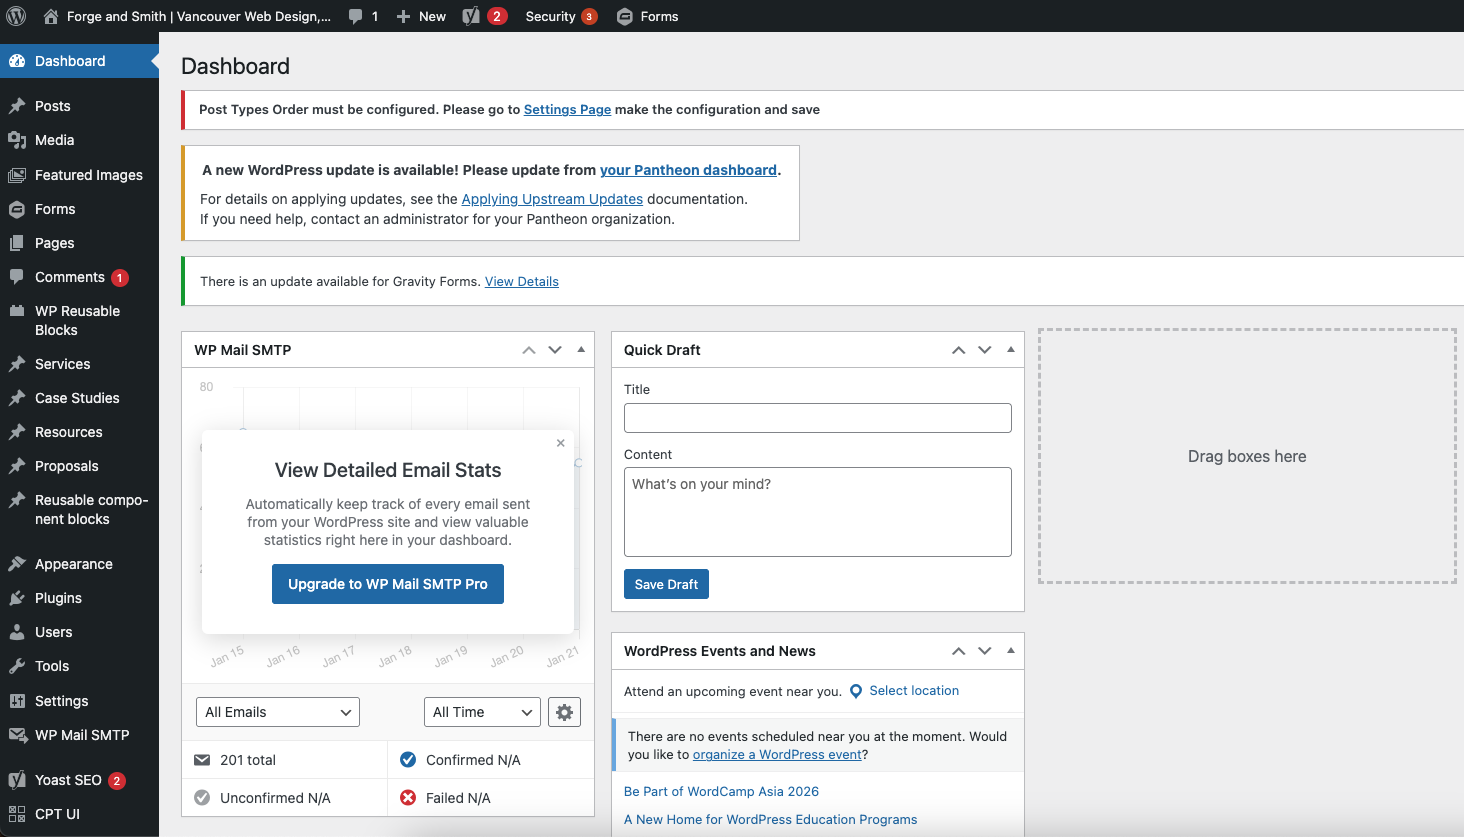
You can use the lefthand menu to navigate to the area in which you want to edit or create content. You can log out in the upper right corner.
Posts vs. Pages
Posts are a WordPress function that enables websites to use loops (Refoundry Query Blocks) that automatically display all posts of a certain type, matching custom filters.
Pages are simply another WordPress content type. They can both use the same blocks, and be any length. The key difference is that pages don’t work with Query Blocks.
Learn more about pages vs. posts in this resource.
Other Content Types
You’ll see several other areas of the site or content types in the lefthand menu. Here’s a sampling of typical content types, though yours may be different based on what we built for you. Depending on your user role, you also may not have access to all of your site’s content types.
- Media is your complete media library. All of your site’s images should be found here. You can drag and drop images into the media library, choose them from your computer, or add them to the media library from within a post by following the prompts after inserting a Refoundry Image Block.
- Forms is where your forms are configured. You can also find form data here.
- Services or Products are where you would find the detail pages for your offering, and create new ones with the template.
- Case Studies or Projects are where you would find existing detail pages that showcase your work, and create new ones with the template.
- Resources, Publications, or Learn are common areas where our clients publish educational content.
- Events would be where event posts are created and managed.
- Appearance > Editor is where you can find and edit whole page templates, as well as your navigation (menus) and any patterns that we created for you. Important to note: Anything you edit in this area will edit every instance, so be cautious.
Creating a New Post or Page
You can create a new post of any type in one of three ways. All of these methods will open a new post in the editor view, using the default post template.
- You can click the Posts or other content type from the lefthand menu to open that content type’s dashboard, and choose “Add New [Post]”
- You can hover over the Posts or the other content type in the lefthand menu, and choose “Add New [Post]” from the menu that slides out (if you’ve already clicked the option, “Add New [Post]” will appear below the menu heading, on the left side of the screen)
- You can hover over “New” in the menu at the top of the screen, and choose the type of content you want to create
Once the new post opens, you will either have pre-built layouts (most content types) or a Refoundry Paragraph Block waiting to receive text content. You can copy/paste text from another source directly into the Refoundry Paragraph Block. It will detect formatting, and create paragraph, list, heading, and other blocks accordingly.
WordPress auto-saves every few minutes, but it’s always a good idea to save a draft every so often as you work.
You can also preview your page or post without publishing it, by clicking the preview button in the top right area, and choosing to preview on desktop, tablet, or mobile:

When you have finished configuring your content, taxonomies, and other settings, you can click “Publish” in the upper right corner. A sub-menu will slide out, allowing you to schedule publication for a custom day and time if you prefer, and prompting you with suggestions to improve your post (these may not always be helpful, they’re built into WordPress).
Editing a Post
You can begin to edit an existing page or post one of two ways:
- Click the post title from the dashboard view
- Click “Edit [Post]” while viewing the live/frontend view of the post

Once the editor opens, you can click anywhere to edit text content, add or remove images, and customize the taxonomies and other settings in the righthand menu.
Quick Editing an Existing Post
When you navigate to a post type from the menu, you’ll see a dashboard with all of your posts:
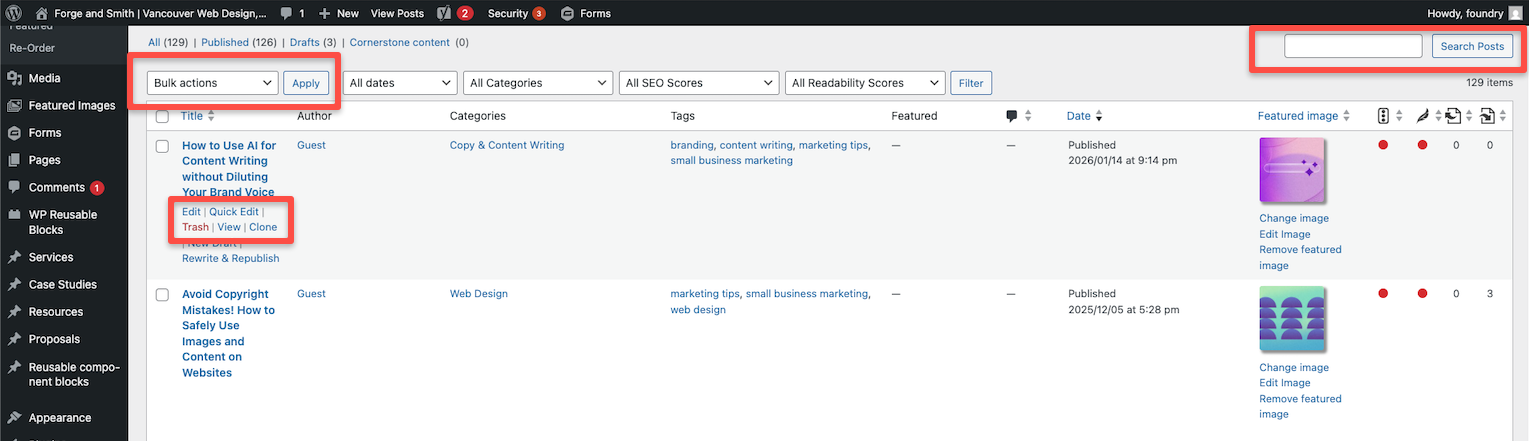
You can click to add a new post, search for a post using keywords, apply bulk actions to multiple posts (such as deleting or adding a new category), or hover over a post’s title to reveal a sub-menu.
You can also sort the results by date or title by clicking the arrows at the tops of the columns, and you can narrow the posts to only those matching a certain taxonomy by clicking its term (i.e. its name).
When you hover over a post title, you will see multiple options:
- Edit opens the post in editor mode, which is the same effect as clicking the post title from the dashboard view.
- Quick Edit lets you quickly edit elements of the post without leaving the dashboard. You can edit the title, slug (URL), publication date, taxonomies, status (published, draft, pending review), author, set a post as sticky, or add a password to your content.
- Trash moves the post to the trash. If you accidentally delete a post, you can click “Trash” from the list of options directly under “Add New Post” at the top of the screen. You’ll find all trashed posts here. They have to be permanently deleted from there.
- View opens the post on the frontend, instead of in edit mode.
- Duplicate makes a copy of the post. This is more useful for cloning a page with a great layout that you want to use, but with different text and images.
Bulk Editing Multiple Posts
If you select multiple posts using the little boxes to the left of the post titles, you can use the Bulk Actions drop-down menu to apply a single action to all of those posts. This is the most efficient way to batch-update content, such as adding a new category to all posts at once by clicking all of the posts, choosing “Edit” and then “Apply” under Bulk Actions, and selecting the new category.
Section 5: Managing Users
Administrators can add new users via the Users menu on the lefthand side and choosing “Add New User” at the top. This will open a set of fields to configure:
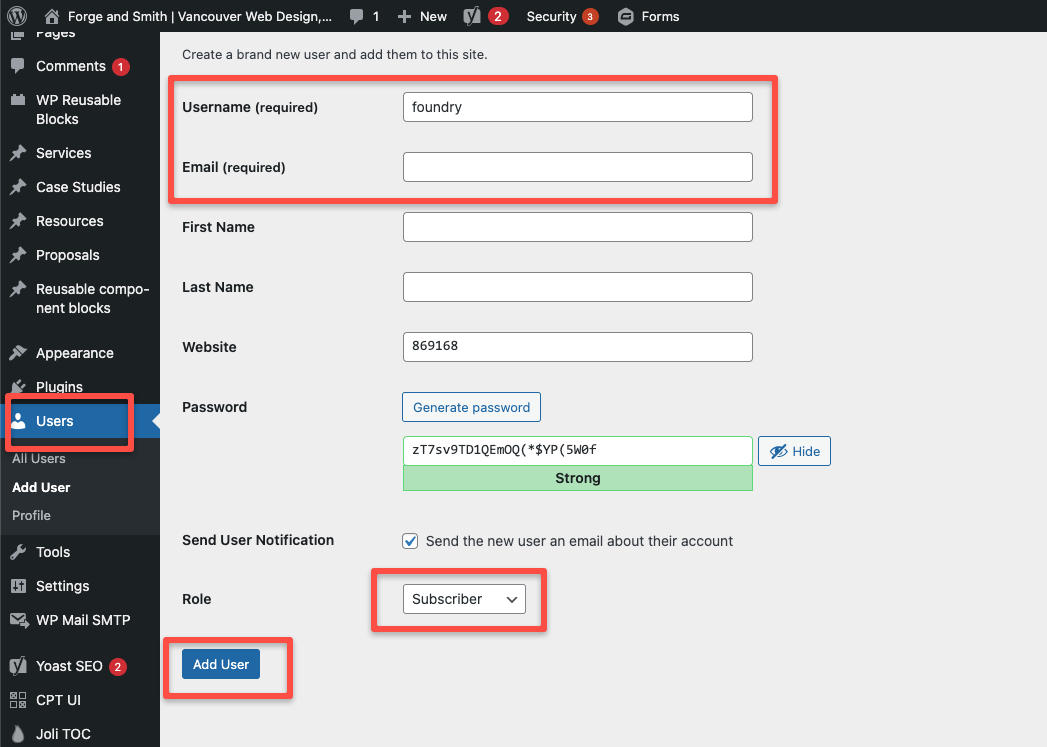
Administrators can also manage most of a user’s details by clicking the user’s name from the main User dashboard. Once a user is added, they can be added as an author via Quick Edit settings or directly within a post.
If a user needs help resetting their password and other methods aren’t working, administrators can manually configure a new password in the user’s profile and share it securely with them.
Users can edit their own details from this same dashboard, they just can’t change their role.
Further reading: Guide to WordPress user roles.